One of the most popular frameworks for creating user interfaces is the Qt framework. Qt is a set of libraries for creating applications of any kind with modules included for making widgets and graphics, using threading and concurrency, SQL, web rendering, and more.
Python users can take advantage of the Qt framework via one of the two available bindings: PySide which is the official binding maintained by the Qt Company and PyQt which is a third party package maintained by Riverbank Computing. While they have slight differences, both will provide you with the same Qt experience.
Provided by the Qt developers are also a set of utilities for UI development: Qt Creator is an IDE designed for Qt development, Qt Linguist is a tool for translating UIs, and Qt Designer is a tool for designing UIs that can then be imported into your code.
However, as it happens with any other tool, there is a right way and a less-than-right way to use Qt Designer. This article will hopefully lead you in the right direction when using Designer’s outputs or deciding if you should even use it at all.
Using Qt Designer
Installation
There are two ways of designing Qt UIs in a visual WYSIWYG (what you see is what you get) environment: the first is by using the Designer plugin included in Qt Creator, the second — which is more common in the Python world and will be discussed here — is by using Qt Designer.
There are a few ways of getting Designer on your system:
- If you’re using PySide6, your installation should already come with Designer. To invoke it, you can run
pyside6-designerin the environment where PySide is installed. - If you’re using PyQt6, you can install the
pyqt6-toolspackage via pip. - You can also install Qt Designer via the Qt Online Installer. While not explicitly mentioned in the installer, the Qt tools are automatically installed when installing any distribution of the Qt core libraries.
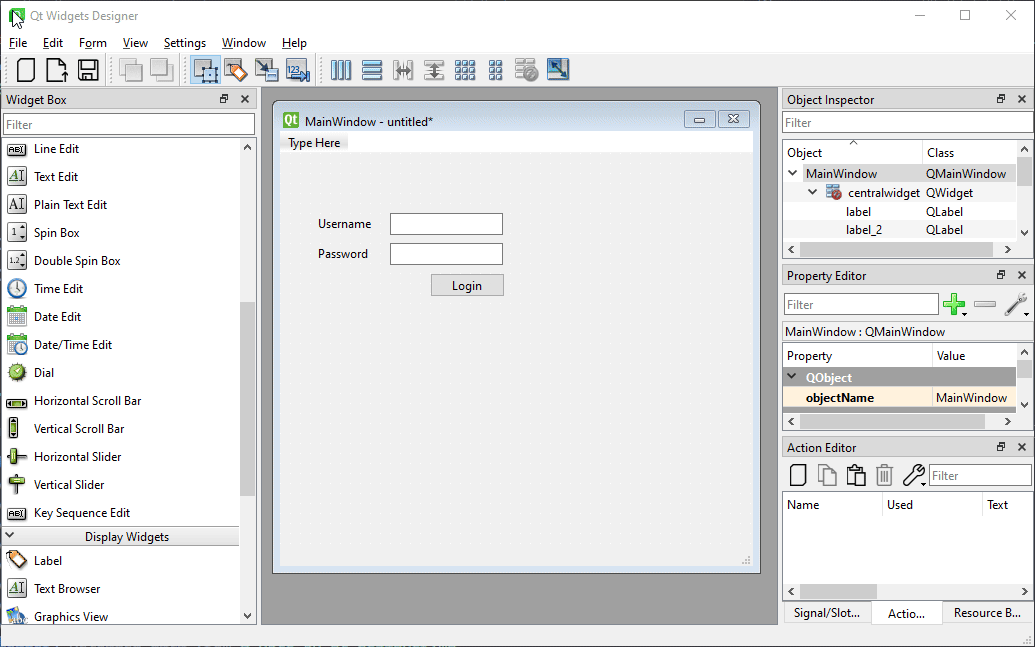
Exploration
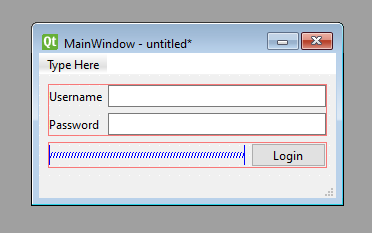
When you open Qt Designer, you should see something like this:
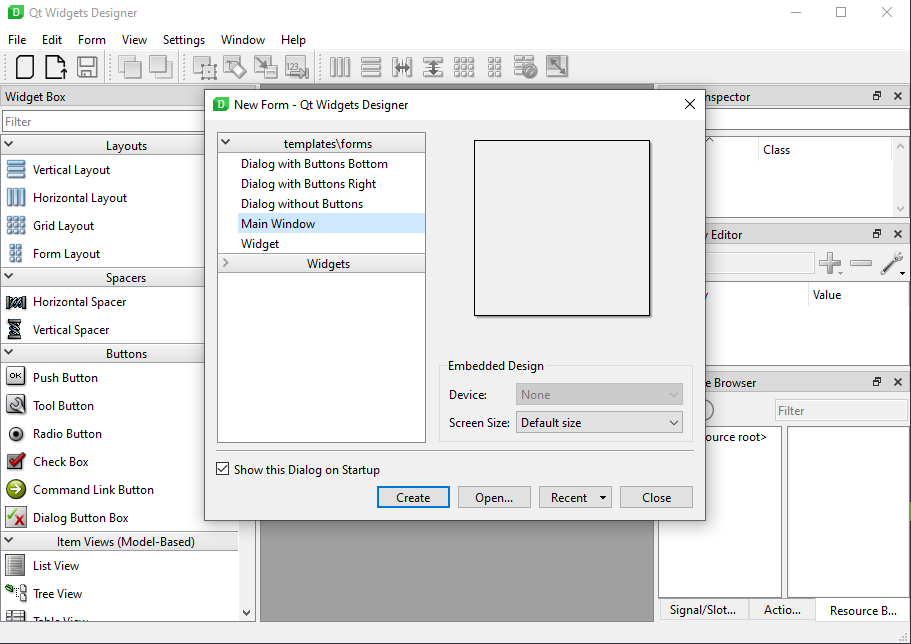
A dialog will pop up with some options to create or open a new UI file plus a variety of presets that you can choose from. In our case, we can select “Main Window” as that is what we are after.
Clicking Create will take us to a blank window where we will be able to drag and drop our widgets into.
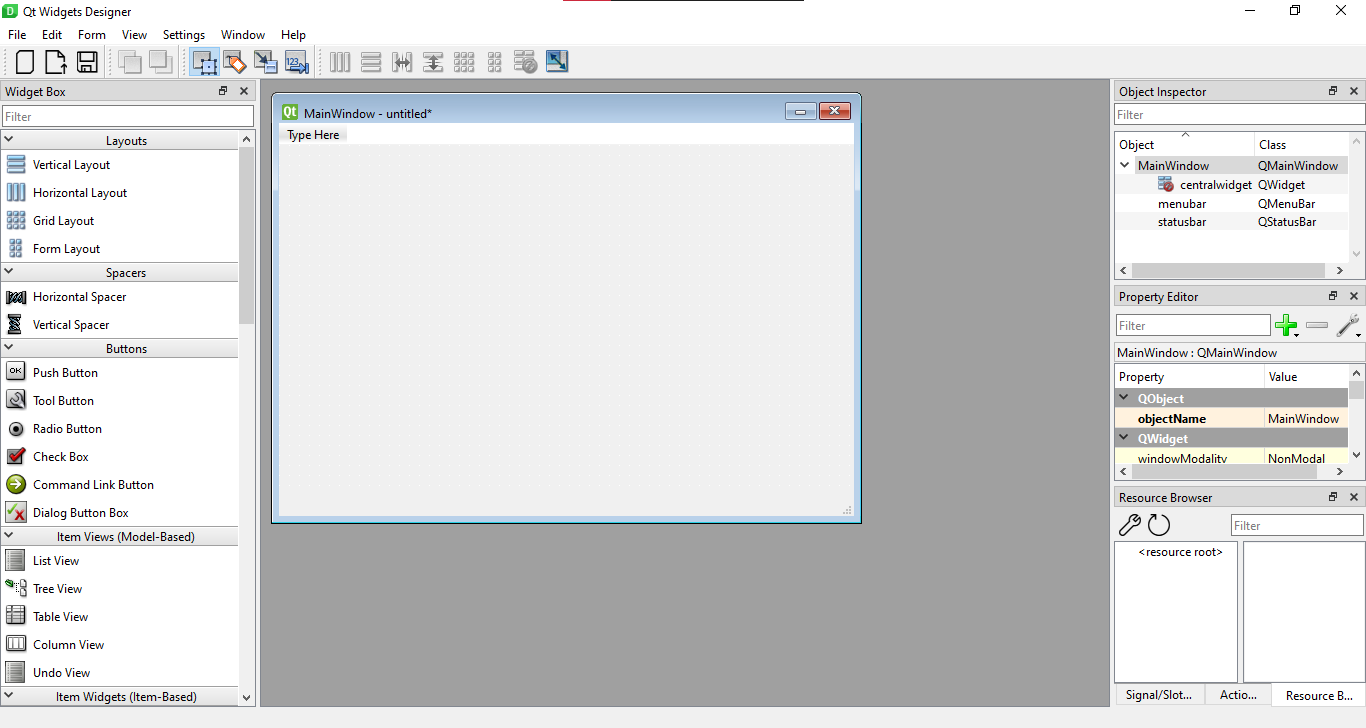
You will notice that the layout of Qt Designer is very similar to other design tools such as Sketch. The menubar at the top includes options for creating and opening UIs, viewing our interface as a separate window and generating the Python or C++ code via uic (we will talk about this tool later on).
The toolbar has options for creating “layouts” which change the way items are grouped in our interface.
To our left, we have the “Widget Box” which includes all of the standard Qt widgets plus any widgets made available via plugins.
To our right, we can change the properties of the widgets we place in our UI. Typically, on startup, you will see 2 sections plus a tabbed section below:
- The Object Inspector which gives you a tree view of the current UI layout visualizing the parent-child relationship between widgets.
- The property editor which allows you to view and change the properties of a widget.
- The tabbed section which is comprised of:
- The Resource Browser which allows you to add or remove resources like images or fonts that can then be used within your application. This is done by using the Qt Resource Compiler.
- The Signal/Slot Editor which helps you connect your widgets to other parts of the application using the signals/slots mechanism provided by Qt.
- Finally, the Action Editor helps you manage the “actions” that appear in the menubar and toolbars.
Tip: Qt Designer will always start with the system’s locale language. If you want to change the app’s language, you must do it before launching the application by setting the
LANGenvironment variable to an ISO 639-1 two-letter language code:On Windows (using Powershell):
$env:LANG="en"; pyside6-designerOn Mac/Linux:
LANG=en pyside6-designer
Creating your first UI
Given what we now know about Qt Designer’s layout, we can start by creating our first UI.
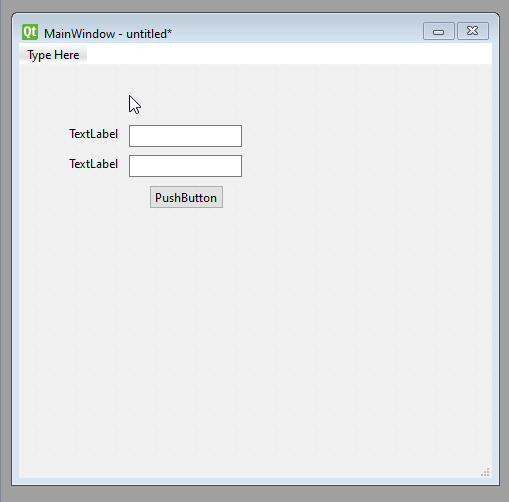
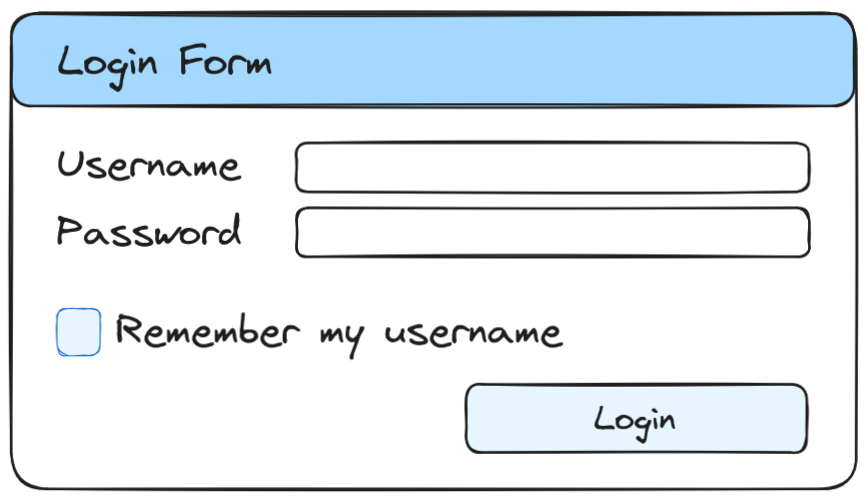
Let’s say that we want to create a really simple login form:
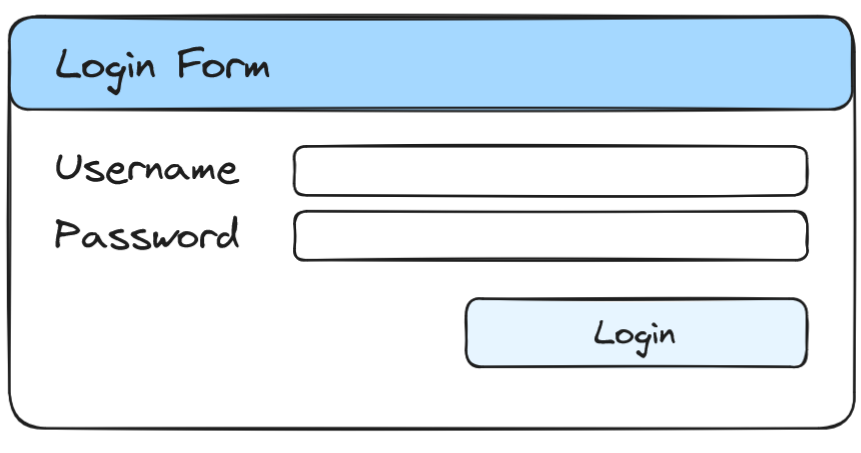
You can see that this form has two labels, two fields (called “Line Edits” in Qt), and a push button at the bottom right of the window.
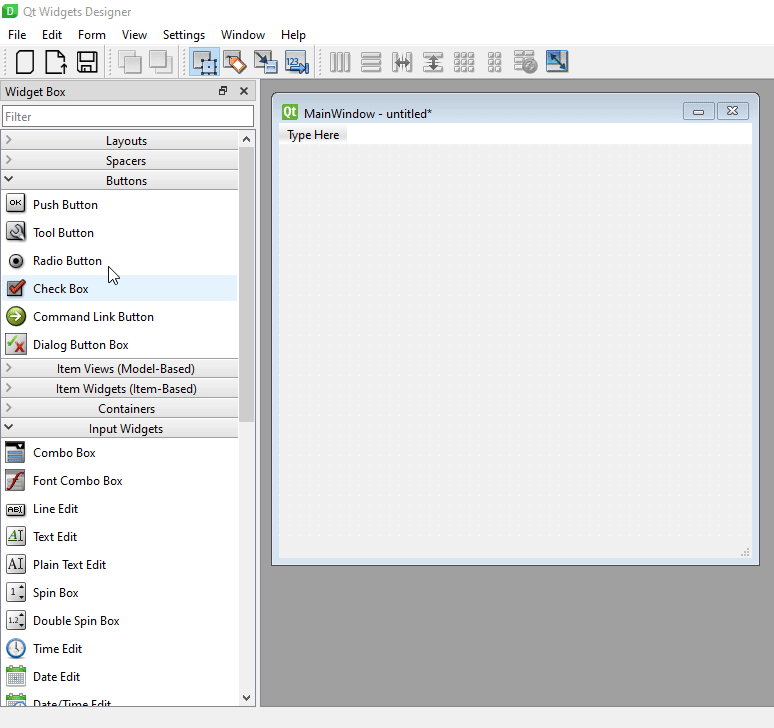
To add those widgets in Designer, we can go to the Widget Box, find our widgets and drag them into our window.
Then, we can double click on the labels and the button to change their text. We can also reposition and resize the elements as we like.
Once you have your widgets, you will probably want to create a layout so they can responsively reposition themselves on window resize.
In our case, our application will use three layouts:
- A form layout for our input fields.
- A horizontal layout for our login button alongside a spacer item that moves the button to the right.
- A vertical layout that will be applied to the entire widget which will group our other layouts.
To add these layouts to our UI, you can select the widgets you want to include in the layout and then click on one of the available layout options in the toolbar.
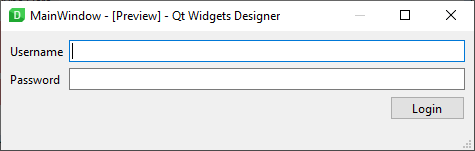
To preview our UI, we can go to Form > Preview or press Ctrl + R.
Now that we are done, we can save our user interface by clicking the “Save” icon in the toolbar or going to pressing Ctrl + S. You will be prompted for a location to save your interface file. Qt Designer will save your UI to a .ui file which is an XML documents that represents the user interface we just created.
To use this file within your app, you will need to either compile it using uic or import it into your app via QUiLoader or uic. These approaches are discussed later in The Right (and Wrong) Way of Using UI Files.
Writing the UI from Scratch
Suppose that you do not want to use Designer to create your UI. You can take the route of writing your Qt UI from scratch using Python. Again, the two offerings here, PySide and PyQt, will allow you to perform identical tasks with the Qt framework. For brevity, we will only cover PySide, though the code should effectively be the same as with PyQt.
Let’s create a file called main.py where we will place our UI. Then, we will import the following Qt widgets which are needed for our login form.
from PySide6.QtWidgets import QApplication, QWidget, QHBoxLayout, QVBoxLayout, QFormLayout, QSpacerItem, QSizePolicy, QLabel, QLineEdit, QPushButton, QMainWindowHere’s a breakdown of what each widget does.
QApplicationallows us to use Qt’s main event loop to run our UI and handle events concurrently.QWidgetis Qt’s base widget class.QHBoxLayout,QVBoxLayout, andQFormLayoutare the layout managers that we will use throughout our app.QSpacerItemis the spacer item that we will add to the layout containing our button.QSizePolicyincludes an enum that we will use with the spacer item.QLabel,QLineEdit, andQPushButtonare for text labels, input fields, and push buttons respectively.QMainWindowis the app’s main window.
Now, we can create our main window as follows:
class MainWindow(QMainWindow):
    def __init__(self) -> None:
        super().__init__()
This class, which inherits from QMainWindow, will be the place where we will place our widgets. The super().__init__() call included here is necessary as Qt uses the init method for setup.
Because the main window itself already has an internal layout (which is used for widgets such as the menubar and toolbars), we will need to assign a central widget to our Qt window. To do this, we can create a QWidget and call self.setCentralWidget on our class.
class MainWindow(QMainWindow):
    def __init__(self) -> None:
        super().__init__()

        self.central_widget = QWidget()

        self.setCentralWidget(self.central_widget)
Our main widget will also need to have a layout so we can position elements within the widget. In the UI we made with Qt Designer, we had a vertical layout for both our login form and button. To use one here, we can create a QVBoxLayout and set it as the layout of our central widget.
class MainWindow(QMainWindow):
    def __init__(self) -> None:
        super().__init__()

        self.central_widget = QWidget()

        self.main_vbox = QVBoxLayout()

        self.central_widget.setLayout(self.main_vbox)
        self.setCentralWidget(self.central_widget)
After that, we will want to add our form layout with the corresponding fields.
class MainWindow(QMainWindow):
    def __init__(self) -> None:
        super().__init__()

        self.central_widget = QWidget()

        self.main_vbox = QVBoxLayout()

        self.form = QFormLayout()

        self.username_label = QLabel("Username")
        self.username_edit = QLineEdit()

        self.password_label = QLabel("Password")
        self.password_edit = QLineEdit()

        self.form.addRow(self.username_label, self.username_edit)
        self.form.addRow(self.password_label, self.password_edit)

        self.central_widget.setLayout(self.main_vbox)
        self.setCentralWidget(self.central_widget)
As you can see, we first create the layout, then the widgets that will be part of it, and then we add each field as a row using the convenient addRow method.
This gives us our form fields. However, we are still missing the login button. For this one, we will create a QHBoxLayout to house our button, a QSpacerItem to move our button to the right, and of course, our QPushButton.
class MainWindow(QMainWindow):
    def __init__(self) -> None:
        super().__init__()

        self.central_widget = QWidget()

        self.main_vbox = QVBoxLayout()

        self.form = QFormLayout()

        # ... the widgets of the form we defined earlier

        self.form.addRow(self.username_label, self.username_edit)
        self.form.addRow(self.password_label, self.password_edit)

        self.button_hbox = QHBoxLayout()

        self.spacer_item = QSpacerItem(40, 20, QSizePolicy.Policy.Expanding, QSizePolicy.Policy.Minimum)
        self.login_button = QPushButton("Login")

        self.button_hbox.addItem(self.spacer_item)
        self.button_hbox.addWidget(self.login_button)

        self.central_widget.setLayout(self.main_vbox)
        self.setCentralWidget(self.central_widget)
Our button is now grouped with the spacer item in our button_hbox layout. The spacer item is defined so that it prefers a width of 40 and a height of 20 and so that it stretches or expands horizontally and shrinks down to its minimum height vertically. Because this is a spacer item, we must add it using the addItem method. To add widgets to a layout, you can use the addWidget method.
To finish our UI, we must add the two layouts to the main vertical layout using addLayout:
class MainWindow(QMainWindow):
    def __init__(self) -> None:
        super().__init__()

        self.central_widget = QWidget()

        self.main_vbox = QVBoxLayout()

        self.form = QFormLayout()

        # ... the widgets of the form we defined earlier

        self.form.addRow(self.username_label, self.username_edit)
        self.form.addRow(self.password_label, self.password_edit)

        self.button_hbox = QHBoxLayout()

        # ... the widgets of the button hbox we defined earlier

        self.button_hbox.addItem(self.spacer_item)
        self.button_hbox.addWidget(self.login_button)

        self.main_vbox.addLayout(self.form)
        self.main_vbox.addLayout(self.button_hbox)

        self.central_widget.setLayout(self.main_vbox)
        self.setCentralWidget(self.central_widget)
We are done with our UI! To display it, we can add an if __name__ == "__main__" clause to the end of our code so that it creates a QApplication and shows our window only when the script is executed directly.
class MainWindow(QMainWindow):
    ... # the code we wrote earlier


if __name__ == "__main__":
    app = QApplication()

    window = MainWindow()
    window.show()

    raise SystemExit(app.exec())
window.show() is responsible for showing our main window and the app.exec() call at the end starts the Qt event loop so that our UI is displayed until the user dismisses it.
Notice how app.exec() is wrapped in a raise SystemExit(...) call. This is one of two ways (the other being sys.exit()) we can send the exit code that app.exec() returns so that it can be used by other applications calling our own to determine whether the app ran without errors.
Our final code should look like this.
from PySide6.QtWidgets import QApplication, QWidget, QHBoxLayout, QVBoxLayout, QFormLayout, QSpacerItem, QSizePolicy, QLabel, QLineEdit, QPushButton, QMainWindow
class MainWindow(QMainWindow):
def __init__(self) -> None:
super().__init__()
self.central_widget = QWidget()
self.main_vbox = QVBoxLayout()
self.form = QFormLayout()
self.username_label = QLabel("Username")
self.username_edit = QLineEdit()
self.password_label = QLabel("Password")
self.password_edit = QLineEdit()
self.form.addRow(self.username_label, self.username_edit)
self.form.addRow(self.password_label, self.password_edit)
self.button_hbox = QHBoxLayout()
self.button_hbox.addItem(self.spacer_item)
self.button_hbox.addWidget(self.login_button)
self.button_hbox.addItem(self.spacer_item)
self.button_hbox.addWidget(self.login_button)
self.main_vbox.addLayout(self.form)
self.main_vbox.addLayout(self.button_hbox)
self.central_widget.setLayout(self.main_vbox)
self.setCentralWidget(self.central_widget)
if __name__ == "__main__":
app = QApplication()
window = MainWindow()
window.show()
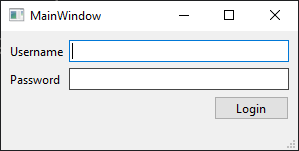
raise SystemExit(app.exec())And our UI will look the same as with our Qt Designer example.
A few things you may have noticed
If you compare the generated code with our own, you will notice that ours includes less boilerplate. Writing the UI yourself provides a finer level of control and flexibility allowing you to design UIs quickly once you get into the rhythm of hand coding. However, it is crucial that you learn how to organize your UI so as to make it as separate from your application code as possible.
This example is simple by design so that you can quickly reproduce it on your end. However, you will likely want to split up the components either into methods within the main window or into separate widgets so that they’re more maintainable long term and also reusable in other places.
You may have also noticed that Qt uses a different naming convention than what we have used to define our variables. Qt uses the
camelCaseconvention while we are using PEP 8’ssnake_caseconvention. This is in line with the examples provided in the PySide documentation. However, you can choose the naming convention you’d like as long as you stay consistent, though a tendency towards Python’s conventions is appreciated.
Qt Designer vs Writing the UI Yourself
We have explored the two ways you can make your Qt user interface. You can use Qt Designer or you can write it yourself. This might leave you with a question: which method do I choose?
There’s a group of people that will tell you to not use Qt Designer for making UIs, especially when you’re a beginner. The common argument is that Qt Designer abstracts the process of creating the UI yourself: the process of defining widgets, creating layouts and windows, adding signals and slots, etc. Qt Widgets is a core part of the Qt ecosystem and by not writing the UI yourself you would be missing out on learning it.
While there is some truth to this sentiment, there are also many good things that come when using Qt Designer as a beginner:
- Qt Designer is a quick and easy way of viewing and interacting with the set of Qt widgets available.
- It is a simple way of prototyping your UI quickly increasing productivity.
- Designer promotes separation of UI logic from application logic.
Those same advantages apply to anyone who works with Qt no matter their experience level. If you don’t want to spend time hand coding the GUI and all you want to focus on is your application logic, Qt Designer is definitely an appealing option. However, as we will see in the next section, there are many pitfalls you can end up in if you don’t use the Qt design tools properly.
Likewise, there are also many advantages when hand coding your UI, especially in places where Qt Designer simply cannot help you:
- Once you get more experienced in Qt, your productivity when making UIs from scratch will likely be the same if not greater than when using Qt Designer.
- Hand coding allows a finer level of control when creating UIs reducing boilerplate.
- Hand coding will likely be the only option if you want to use custom widgets or if you want to dynamically update widgets and layouts.
However, in this environment, it also tends to become really easy to couple your UI logic with your application logic which, as you progress in making your UI, will be harder to decouple.
My recommendation, especially if you’re a beginner, is to test out each option: learn the basics of Qt Designer and learn the basics of Qt Widgets through hand coding. Pick the option that you feel most comfortable with and pick the best traits of both options. If you want to use Designer, do not modify the uic outputs. If you want to write the UI yourself, make sure to separate UI logic from application logic early on in your development process.
The Right (and Wrong) Way of Using UI Files
We have covered Qt Designer to a fair extent here. However, I also want to point out a common mistake that many beginners fall into when using Qt Designer, specifically when it comes to compiling your UI.
Let’s go back to the login form example we used earlier, which should look something like this:
Most tutorials about using Qt Designer in Python will at some point mention the Qt UI Compiler (also known as uic). This is a tool that will take your .ui file and convert it into Python code that can then be imported into your application.
You can use the Qt UI Compiler either from Qt Designer itself by going to Form > View Python Code or by using the uic command line tool. In PyQt, this tool will made available as called pyuic6. In PySide6, it will be called pyside6-uic. Both behave in practically the same way.
To convert your .ui file to a Python file, you can run the following:
pyside6-uic example.ui -o example.pyThis will take your example.ui file and compile it into a file named example.py which will look something like this:
# -*- coding: utf-8 -*-

################################################################################
## Form generated from reading UI file 'example.ui'
##
## Created by: Qt User Interface Compiler version 6.9.0
##
## WARNING! All changes made in this file will be lost when recompiling UI file!
################################################################################

from PySide6.QtCore import (...)
from PySide6.QtGui import (...)
from PySide6.QtWidgets import (...)

class Ui_MainWindow(object):
    def setupUi(self, MainWindow):
        if not MainWindow.objectName():
            MainWindow.setObjectName(u"MainWindow")
        MainWindow.resize(297, 145)

        self.centralwidget = QWidget(MainWindow)
        # ... widget definitions would go here

        MainWindow.setCentralWidget(self.centralwidget)

        # ... status bar and menu bar
        self.retranslateUi(MainWindow)

        QMetaObject.connectSlotsByName(MainWindow)
    # setupUi

    def retranslateUi(self, MainWindow):
        MainWindow.setWindowTitle(QCoreApplication.translate("MainWindow", u"MainWindow", None))
        # ... other translations
    # retranslateUi
Now, this is the point where we should be careful with what we do with this file. Unfortunately, most beginners (and some tutorials) go down the wrong route.
The Wrong Way
It is not uncommon for beginners to simply take a look at this file, remove the warning at the top of the code, and start writing their logic in between the generated UI. An example of that is shown below where our hypothetical developer adds their login functionality in between uic’s outputs.
# -*- coding: utf-8 -*-

from PySide6.QtCore import (...)
from PySide6.QtGui import (...)
from PySide6.QtWidgets import (...)

class Ui_MainWindow(object):
    def setupUi(self, MainWindow):
        if not MainWindow.objectName():
            MainWindow.setObjectName(u"MainWindow")
        MainWindow.resize(297, 145)

        self.centralwidget = QWidget(MainWindow)

        self.pushButton = QPushButton(self.centralwidget)
        self.pushButton.setObjectName(u"pushButton")
        # ... more widget definitions would go here

        MainWindow.setCentralWidget(self.centralwidget)

        # ... status bar and menu bar
        self.retranslateUi(MainWindow)

        QMetaObject.connectSlotsByName(MainWindow)

        # your new logic
        self.pushButton.clicked.connect(self.login)

    def retranslateUi(self, MainWindow):
        MainWindow.setWindowTitle(QCoreApplication.translate("MainWindow", u"MainWindow", None))
        # ... other translations

    def login(self):
        ... # do login work


if __name__ == "__main__":
    app = QApplication()

    ui = Ui_MainWindow()
    window = QMainWindow()

    ui.setupUi(window)
    window.show()

    raise SystemExit(app.exec())
While this seems fine at first, once you add more features to your application, this approach will quickly become impractical.
Suppose you now want to add a checkbox that allows your app to remember your username. Something like the image below.
Without having to write the widget yourself, you would now need to go back into Designer, add your checkbox, save the UI file, compile it with uic, and finally find and copy your logic from your previous output and paste it into the new output. I think you can tell why this process will become increasingly more complicated to perform as your app grows.
This is exactly the reason why the warning that you just removed is there:
## WARNING! All changes made in this file will be lost when recompiling UI file!As the warning says, you are NOT supposed to modify the outputs generated by uic because you will lose them on recompile. Having to maintain “copies” of your code to not lose your additions will only make developing and maintaining your application harder.
The Right Way
Because you shouldn’t modify the file generated by uic, we will need to find a different way of loading it into our Python code.
There are two ways of doing this: you can take the route of compiling with uic and importing the generated file into your code or you can use a Qt-provided module to import the UI file directly without needing to compile it.
Approach 1: Using uic
As we saw earlier, we used pyside6-uic (or pyuic6 with PyQt) to convert our .ui file into a Python file. Let’s assume that we are using PySide6 and are compiling to a file called example_ui.py
pyside6-uic example.ui -o example_ui.pyexample_ui.py will be the same or similar to the code we generated earlier. However, unlike in the previous approach, we will NOT be modifying the file.
Instead, we will create a file named example.py and write the following:
from PySide6.QtWidgets import QMainWindow, QApplication
from example_ui import Ui_MainWindow


class MainWindow(QMainWindow, Ui_MainWindow):
    def __init__(self) -> None:
        super().__init__()

        self.setupUi(self)


if __name__ == "__main__":
    app = QApplication()

    window = MainWindow()
    window.show()

    raise SystemExit(app.exec())
You will notice that we are importing QMainWindow from Qt Widgets and the example_ui file we generated with uic. We next define a MainWindow class that inherits both from a QMainWindow and the Ui_MainWindow object that contains our UI. We then call setupUi within our class so that its widgets are placed on the window and then we run the application and show the window as usual.
Two things
Widgets in the
uicoutput are made available by means of their object name. You can take a look at how your widgets are named by looking at the Object Inspector in the Designer window.For example, our main window has an object name of “MainWindow”. That’s why we are importing it as
Ui_MainWindow(Ui_being a prefix added byuicto the class name of the compiled window).If you prefer to avoid multiple inheritance, you can take the route of composition and make the UI object an attribute of
MainWindowso that you can interact with the UI through there.class MainWindow(QMainWindow): def __init__(self) -> None: super().__init__() self.ui = Ui_MainWindow() self.ui.setupUi(self)
If we save and run example.py, we will see our familiar UI:
If we wanted to add our login functionality, we can simply do it through our main window.
from PySide6.QtWidgets import QMainWindow, QApplication
from example_ui import Ui_MainWindow


class MainWindow(QMainWindow, Ui_MainWindow):
    def __init__(self) -> None:
        super().__init__()

        self.setupUi(self)

        # pushButton is the object name of our login button
        # you will probably want to rename it which you can do either
        # via the object inspector or via the properties panel in Designer.
        self.pushButton.clicked.connect(self.login)

    def login(self) -> None:
        ... # add your login functionality here


if __name__ == "__main__":
    app = QApplication()

    window = MainWindow()
    window.show()

    raise SystemExit(app.exec())
The advantage of this approach is that we no longer need to worry about copying over logic from previous code and pasting it into new code each time we make a change in the UI and recompile it. The UI logic is handled by our generated file and the application logic is handled by us within our own module.
Approach 2: QUiLoader and uic
The second approach involves using a Qt-provided module to load the .ui file directly into our application.
If using PySide6, you can import the QUiLoader class part of the QtUiTools package and call QUiLoader.load with the path to our file to load our UI.
import sys
from PySide6.QtWidgets import QApplication
from PySide6.QtUiTools import QUiLoader

loader = QUiLoader()

app = QApplication()

window = loader.load("example.ui")
window.show()

raise SystemExit(app.exec())
If using PyQt6, you can import the PyQt6.uic module and call loadUi from it:
from PyQt6.QtWidgets import QApplication
from PyQt6.uic import loadUi

app = QApplication()

window = loadUi("example.ui")
window.show()

raise SystemExit(app.exec())
Both QUiLoader.load and uic.loadUi will perform basically the same process. They will dynamically compile the .ui file into a Python class that can then be used within your code.
The difference between PySide’s load and PyQt’s loadUi is that the former also allows you to specify a QIODevice to load the UI file from whereas the latter only allows a filepath as a parameter.
Notice how in both examples we didn’t need to wrap a
QMainWindowaround our UI. This is becauseQUiLoader.loadanduic.loadUiwill automatically choose the QWidget subclass appropriate to the UI we created within Designer.
The advantage of this approach is that it removes the process of manually compiling the UI file with uic every time you make a change. All you have to do now is change the .ui file and restart your app. The main disadvantage, however, is that you will lose any form of autocompletion for the widgets contained in your UI.
If that’s not something you want, you can create a script that runs uic and then your app, which you can use in place of running both commands separately:
pyside6-uic example.ui -o example_ui.py
python example.py
Conclusion
Hopefully, at this point, you should be able to decide for yourself whether Qt Designer is the right option for you. We have learned some of the basics of Qt Designer and how it compares to hand coding a UI.
We have also looked at the advantages and disadvantages of each approach plus common mistakes that you can make with each approach.
If you would like to learn more about Qt Designer, you can take a look at the Qt Widgets Designer manual in the Qt documentation.